
Cześć kochani,
dziś mam dla Was projekt dla mnie wyjątkowy...zbliża się kolejna rocznica naszego ślubu i pomyślałam, że w końcu nadszedł czas na wyjątkową oprawę zdjęć. Wybrałam jedno z moich ulubionych z naszej ślubnej sesji i w tym momencie zaczęła się zabawa. Ponieważ zdjęcie jest w zielonej scenerii taką kolorystykę wybrałam jako bazowy kolor mojego projektu. Aby przełamać zieleń i dodać trochę elegancji dodałam biel i złoto.
Hi,
today I have a unique project for you ... our next wedding anniversary is approaching and I thought it was finally time for a unique photo setting. I picked one of my favorites from our wedding session and than the fun started. Due to the photo is in a green scenery, I chose this color scheme as the base color of my project. To break the green and add some elegance, I added white and gold.
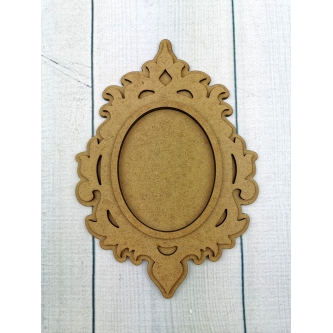
Jako bazę mojego LO wybrałam trójwarstwową ramkę HDF od Agaterii. Pierwszą warstwę okleiłam papierem scrapowym o delikatnym wzorze roślinnym, a brzegi potuszowałam na zielono.
As the basis for my LO, I chose the three-layer HDF frame from Agateria. I covered the first layer with scrap paper with a delicate floral pattern, and the edges were covered with green.

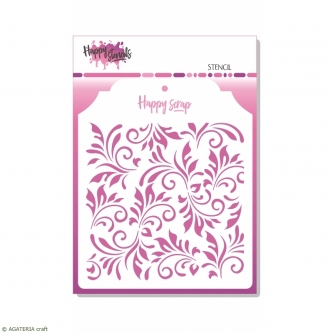
Najbardziej pracochłonna okazała się druga warstwa którą postanowiłam zmediować. Najpierw pokryłam ją białym gesso a następnie kilkoma warstwami białej farby akrylowej, metodą tapowania. Dzięki temu uzyskałam ciekawą nieregularną strukturę. Następnym krokiem było nieregularne pomalowanie bazy zieloną farbą akwarelową oraz nałożenie pasty modelującej za pomocą maski. Po wyschnięciu cieniowałam całość za pomocą zielonej mgiełki oraz tuszu. Czynność powtarzałam kilkukrotnie dodając odrobinę chlapnięć wodą i ponownie cieniując, dzięki temu ramka uzyskała kilka odcieni zieleni. Na koniec dodałam kilka chlapnięć żółtą mgiełką.
The second layer I decided to mediate turned out to be the most laborious. First, I covered it with white gesso and then with several layers of white acrylic paint, using the tap method. Thats why, I obtained an interesting irregular structure. The next step was to irregularly paint the base with green watercolor paint and apply the modeling paste with a mask. After drying, I shaded the whole thing with a green mist and mascara. I repeated the action several times, adding a little splash of water and shading again, thanks to which the frame obtained several shades of green. Finally, I added a few splashes of yellow haze.


Brak komentarzy:
Prześlij komentarz